Ranked #13 by GolfPass Golfer’s Choice 2025

Since it’s opening in 1964, The Steamboat Golf Club has remained a treasure in The Yampa Valley. With generous fairways, small target greens, and challenging shots, a round here will satisfy even the most discriminating player. Open to the public and host to an active social schedule, The Steamboat Golf Club along with our 100 Member/Owners continues to play an integral role in the local community. The 9- hole course borders the Yampa River featuring beautiful views of the valley and Steamboat ski mountain. A near by Driving Range is available. Warm-up cages and chipping green on site are available and free of charge. The Steamboat Golf Club is family oriented and affordable.
Par 35 – Gold/White 2359 Yards | White 2746 Yards | Blue 2913 Yards
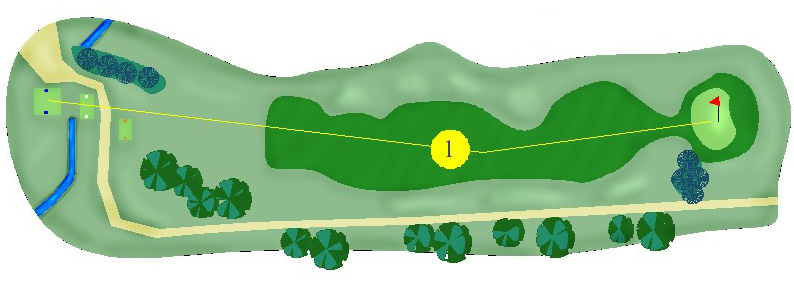
Hole 1
A great way to get started, the opening hole will set the table for your round. Play aggressive and use driver, or use a smooth middle to long iron to leave a manageable distance to the green. Often playing down wind to the tiered green, players must choose the right club in order to safely play for the pin.
Number 1- Par 4 | Gold/White 281 | White 317 | Blue 331 | Green Depth- 24 ft.
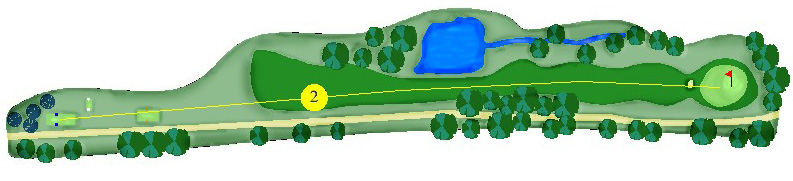
Hole 2
The only Par 5 on the course gives an opportunity for making a splash on the scorecard. Birdies and Eagles are found here, but more than a fair share of big numbers are seen. Out of Bounds borders the entire right side, and water left will gladly accept those attempting to “go big, or go home”. A safe shot in the fairway will leave you calculating if you can carry the green side bunker and still hold the largest green on the course.
Number 2- Par 5 | Gold/White 405 | White 457 | Blue 474 | Green Depth- 29 ft.
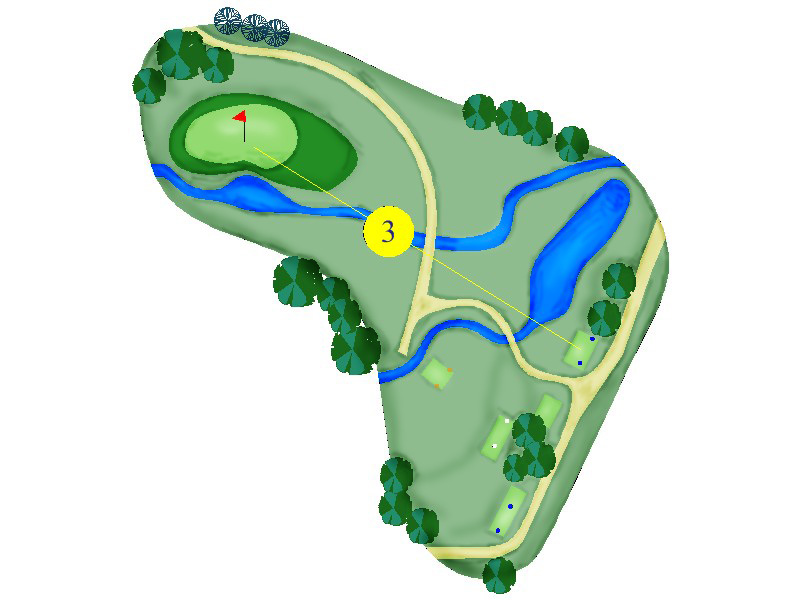
Hole 3
The first Par 3 is an opportunity to steal one before the difficult 3 hole stretch that begins on the 4th hole. A short iron or wedge must be delicately played to avoid both water in front and a tricky shot back if the tee shot goes long. Although a large green to shoot to, timid tee shots can leave for challenging 2 putts. Knock it close and take your momentum to the next tee.
Be sure to turn around on the tee box and enjoy the view!!
Number 3- Par 3 | Gold/White 98 | White 125 | Blue 137 | Green Depth- 31 ft.
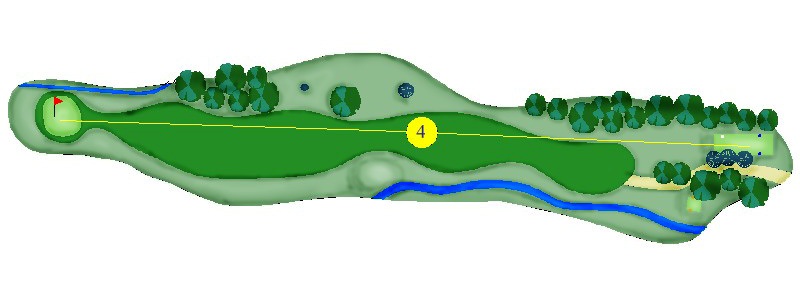
Hole 4
“Grip it and Rip it”, you’ll need it. The longest Par 4 is made longer by the often present breeze in your face. A generous landing area allows players to give it a little extra on the tee shot. Water left and OB right frames the tee shot that must be struck well to have a manageable distance to the green. The small green lays fairly level and will grant those reaching the green in regulation with a rare birdie attempt. Stray approach shots may find water or OB right making this hole seem just a little longer.
Number 4- Par 4(5) | Gold/White 405 | White 409 | Blue 431 | Green Depth- 26 ft.
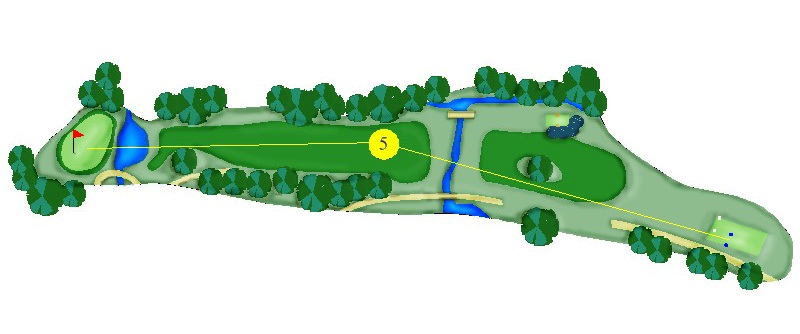
Hole 5
Strategy pays on this short but tricky hole. High handicappers may want to lay up twice and hope to one put for par. Those going for second section of the fairway will have a short approach into the shallow green that slopes from back to front towards the water. Out of Bounds long and right add to the touch needed to score on this hole. The drop area behind the green on the left plays as relief from the shale rock wall behind the green.
Number 5- Par 4 | Gold/White 232 | White 329 | Blue 336 | Green Depth- 19 ft.
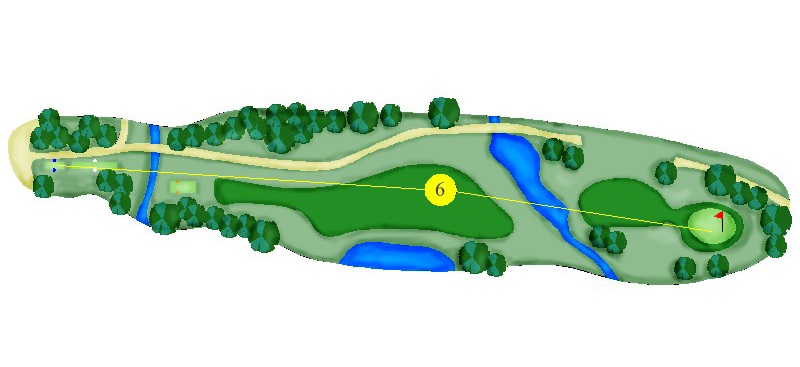
Hole 6
Temptation arrives again with this short length Par 4. Big hitters have the opportunity to clear the water and possibly reach the green. Always a smart play, a tee shot towards the end of the fairway short of the water leaves just more than 100 yards to the toughest and smallest green on the course. Holes cut on the top tier will bring the chance of over shooting the green and leaving a most difficult up and down. Read your putt carefully as there is seldom an easy three footer here.
Number 6- Par 4 | Gold/White 233 | White 279 | Blue 313 | Green Depth- 23 ft.
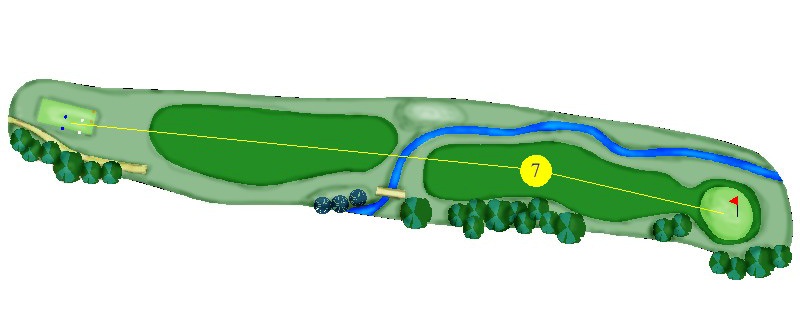
Hole 7
Fairly straight forward, this is a great opportunity to get one back or continue aggressive play. Water left and trouble right could be distracting. Shots missed right often force a well played recovery. Played properly from the tee box, the large green makes for an easy target. Give the audience on the next tee box something to cheer about by knocking it close and walk away with a birdie.
Number 7- Par 4 | Gold/White 314 | White 318 | Blue 325 | Green Depth- 33 ft.
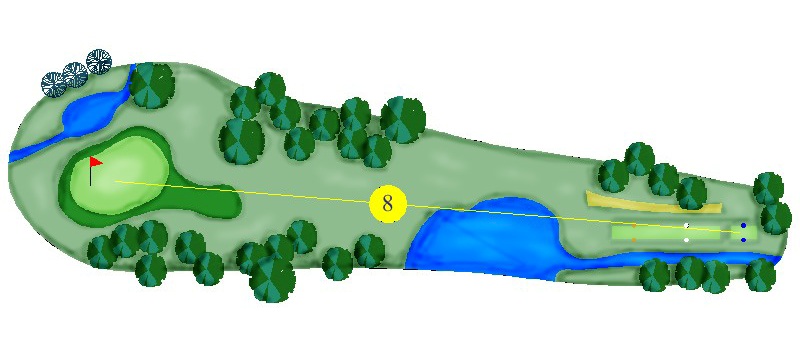
Hole 8
A slightly elevated tee box to a green protected by trees frames this Par 3 nicely. Choosing the right club will be influenced by the slightly incoming cross wind. Recently added bunkers will gather passive shots while the water behind the green will take care of those that are too aggressive. A shot played to the center of the green will leave a good opportunity to any pin location.
Number 8- Par 3 | Gold/White 144 | White 157 | Blue 191 | Green Depth- 22 ft.
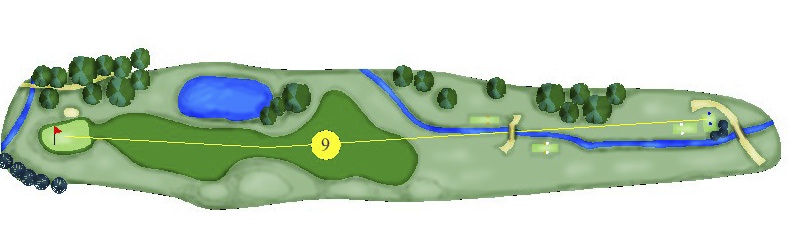
Hole 9
The home hole is no time to relax on your round. A strong drive is needed to have an iron shot capable of holding this small and quick green. Water right will play off the tee box and undulated fairway mounds to the left puts a premium on landing the fairway. Don’t be fooled into going for tucked pin locations. Little room for error will force a tough up and down to finish your round. Now come inside and tell us all about it over lunch or make the turn and do it all over again!!
Number 9- Par 4 | White/Gold 247 | White 355 | Blue 375 |Green Depth- 25 ft.